Build a User Management App with RedwoodJS
This tutorial demonstrates how to build a basic user management app. The app authenticates and identifies the user, stores their profile information in the database, and allows the user to log in, update their profile details, and upload a profile photo. The app uses:
- Supabase Database - a Postgres database for storing your user data and Row Level Security so data is protected and users can only access their own information.
- Supabase Auth - allow users to sign up and log in.
- Supabase Storage - allow users to upload a profile photo.
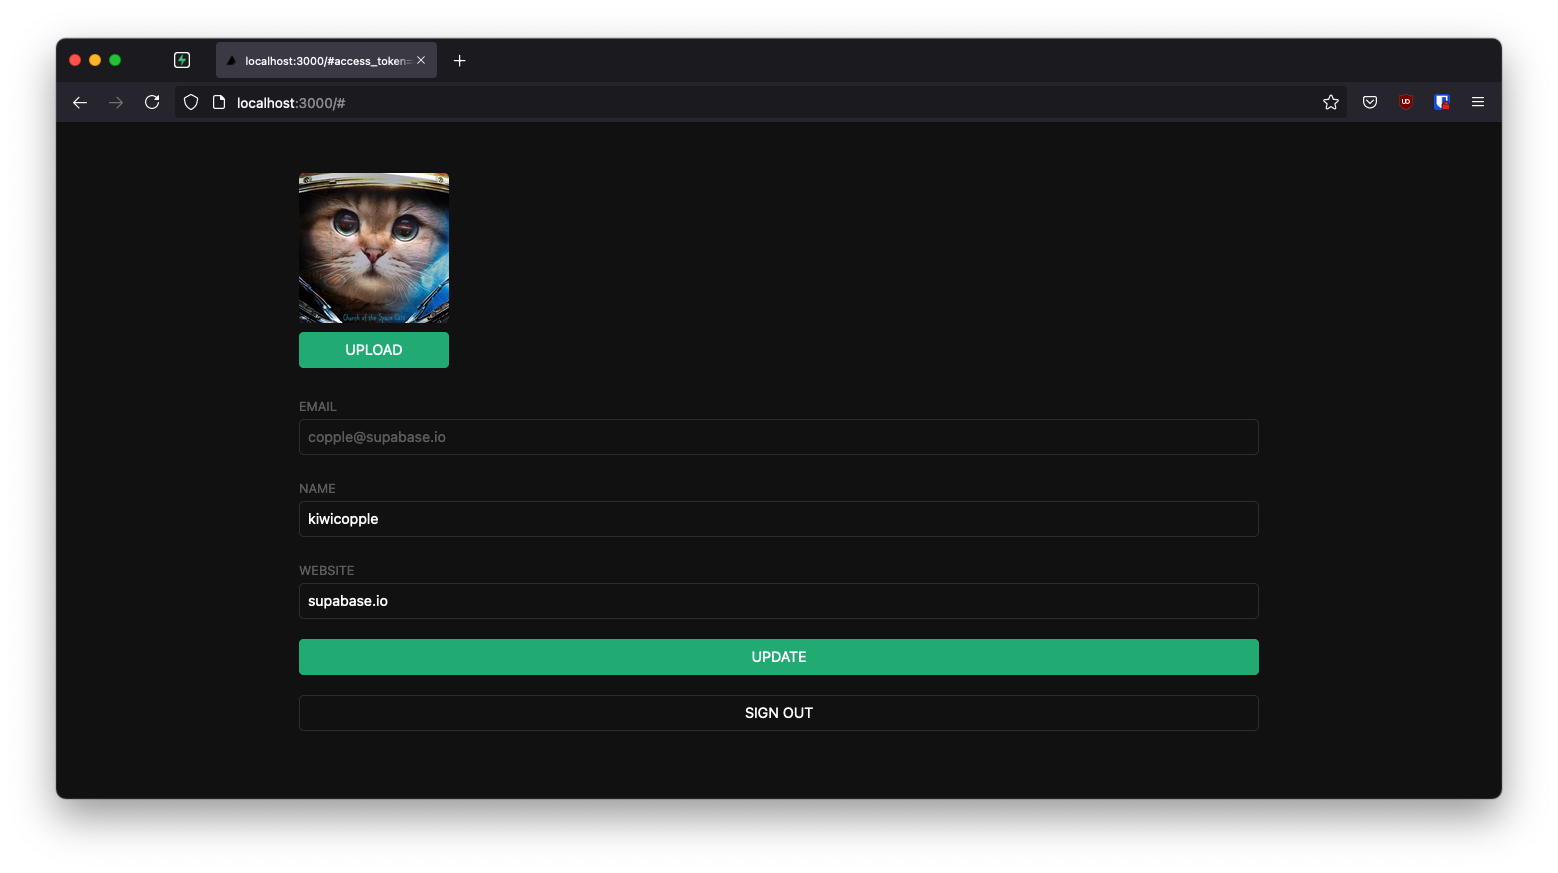
If you get stuck while working through this guide, you can find the full example on GitHub.
About RedwoodJS#
A Redwood application is split into two parts: a frontend and a backend. This is represented as two node projects within a single monorepo.
The frontend project is called web and the backend project is called api. For clarity, we will refer to these in prose as "sides," that is, the web side and the api side.
They are separate projects because code on the web side will end up running in the user's browser while code on the api side will run on a server somewhere.
Important: When this guide refers to "API," that means the Supabase API and when it refers to api side, that means the RedwoodJS api side.
The api side is an implementation of a GraphQL API. The business logic is organized into "services" that represent their own internal API and can be called both from external GraphQL requests and other internal services.
The web side is built with React. Redwood's router lets you map URL paths to React "Page" components (and automatically code-split your app on each route).
Pages may contain a "Layout" component to wrap content. They also contain "Cells" and regular React components.
Cells allow you to declaratively manage the lifecycle of a component that fetches and displays data.
For the sake of consistency with the other framework tutorials, we'll build this app a little differently than normal.
We won't use Prisma to connect to the Supabase Postgres database or Prisma migrations as one typically might in a Redwood app.
Instead, we'll rely on the Supabase client to do some of the work on the web side and use the client again on the api side to do data fetching as well.
That means you will want to refrain from running any yarn rw prisma migrate commands and also double check your build commands on deployment to ensure Prisma won't reset your database. Prisma currently doesn't support cross-schema foreign keys, so introspecting the schema fails due
to how your Supabase public schema references the auth.users.
Project setup#
Before you start building you need to set up the Database and API. You can do this by starting a new Project in Supabase and then creating a "schema" inside the database.
Create a project#
- Create a new project in the Supabase Dashboard.
- Enter your project details.
- Wait for the new database to launch.
Set up the database schema#
Now set up the database schema. You can use the "User Management Starter" quickstart in the SQL Editor, or you can copy/paste the SQL from below and run it.
- Go to the SQL Editor page in the Dashboard.
- Click User Management Starter under the Reference > Examples tab.
- Click Run.
You can pull the database schema down to your local project by running the db pull command. Read the local development docs for detailed instructions.
supabase link --project-ref <project-id># You can get <project-id> from your project's dashboard URL: https://supabase.com/dashboard/project/<project-id>supabase db pullGet API details#
To interact with data in database tables, you use the client libraries that wrap the auto-generated Data API endpoints, authenticating using the Project URL and key from the project Connect dialog.
See API keys for a full explanation of all key types, their uses, and where to find them.
Building the app#
Build the RedwoodJS app from scratch.
RedwoodJS requires Node.js >= 14.x <= 16.x and Yarn >= 1.15.
Make sure you have installed yarn since RedwoodJS relies on it to manage its packages in workspaces for its web and api "sides."
Initialize a RedwoodJS app#
We can use Create Redwood App command to initialize
an app called supabase-redwoodjs:
yarn create redwood-app supabase-redwoodjscd supabase-redwoodjsWhile the app is installing, you should see:
✔ Creating Redwood app ✔ Checking node and yarn compatibility ✔ Creating directory 'supabase-redwoodjs'✔ Installing packages ✔ Running 'yarn install'... (This could take a while)✔ Convert TypeScript files to JavaScript✔ Generating typesThanks for trying out Redwood!Then install the only additional dependency supabase-js by running the setup auth command:
yarn redwood setup auth supabaseWhen prompted:
Overwrite existing /api/src/lib/auth.[jt]s?
Say, yes and it will setup the Supabase client in your app and also provide hooks used with Supabase authentication.
✔ Generating auth lib... ✔ Successfully wrote file `./api/src/lib/auth.js` ✔ Adding auth config to web... ✔ Adding auth config to GraphQL API... ✔ Adding required web packages... ✔ Installing packages... ✔ One more thing... You will need to add your Supabase URL (SUPABASE_URL), public API KEY, and JWT SECRET (SUPABASE_KEY, and SUPABASE_JWT_SECRET) to your .env file.Next, we want to save the environment variables in a .env.
We need the API URL as well as the key and jwt_secret that you copied earlier.
SUPABASE_URL=YOUR_SUPABASE_URLSUPABASE_KEY=YOUR_SUPABASE_PUBLISHABLE_KEYSUPABASE_JWT_SECRET=YOUR_SUPABASE_JWT_SECRETAnd finally, you will also need to save only the web side environment variables to the redwood.toml.
[web] title = "Supabase Redwood Tutorial" port = 8910 apiProxyPath = "/.redwood/functions" includeEnvironmentVariables = ["SUPABASE_URL", "SUPABASE_KEY"][api] port = 8911[browser] open = trueThese variables will be exposed on the browser, and that's completely fine. They allow your web app to initialize the Supabase client with your publishable key since we have Row Level Security enabled on our Database.
You'll see these being used to configure your Supabase client in web/src/App.js:
// ... Redwood importsimport { AuthProvider } from '@redwoodjs/auth'import { createClient } from '@supabase/supabase-js'// ...const supabase = createClient(process.env.SUPABASE_URL, process.env.SUPABASE_KEY)const App = () => ( <FatalErrorBoundary page={FatalErrorPage}> <RedwoodProvider titleTemplate="%PageTitle | %AppTitle"> <AuthProvider client={supabase} type="supabase"> <RedwoodApolloProvider> <Routes /> </RedwoodApolloProvider> </AuthProvider> </RedwoodProvider> </FatalErrorBoundary>)export default AppApp styling (optional)#
An optional step is to update the CSS file web/src/index.css to make the app look better.
You can find the full contents of this file in the example repository.
Start RedwoodJS and your first page#
Test your setup by starting the app:
yarn rw devrw is an alias for redwood, as in yarn rw to run Redwood CLI commands.
You should see a "Welcome to RedwoodJS" page and a message about not having any pages yet.
Create a "home" page:
yarn rw generate page home /✔ Generating page files... ✔ Successfully wrote file `./web/src/pages/HomePage/HomePage.stories.js` ✔ Successfully wrote file `./web/src/pages/HomePage/HomePage.test.js` ✔ Successfully wrote file `./web/src/pages/HomePage/HomePage.js`✔ Updating routes file...✔ Generating types ...The / is important here as it creates a root level route.
You can stop the dev server if you want; to see your changes, run yarn rw dev again.
You should see the Home page route in web/src/Routes.js:
import { Router, Route } from '@redwoodjs/router'const Routes = () => { return ( <Router> <Route path="/" page={HomePage} name="home" /> <Route notfound page={NotFoundPage} /> </Router> )}export default RoutesSet up a sign-in component#
Set up a Redwood component to manage sign-ins and sign-ups. We'll use Magic Links, so users can sign in with their email without using passwords.
yarn rw g component auth ✔ Generating component files... ✔ Successfully wrote file `./web/src/components/Auth/Auth.test.js` ✔ Successfully wrote file `./web/src/components/Auth/Auth.stories.js` ✔ Successfully wrote file `./web/src/components/Auth/Auth.js`Now, update the Auth.js component to contain:
import { useAuth } from '@redwoodjs/auth'import { useState } from 'react'const Auth = () => { const { logIn } = useAuth() const [loading, setLoading] = useState(false) const [email, setEmail] = useState('') const handleLogin = async (email) => { try { setLoading(true) const { error } = await logIn({ email }) if (error) throw error alert('Check your email for the login link!') } catch (error) { alert(error.error_description || error.message) } finally { setLoading(false) } } return ( <div className="row flex-center flex"> <div className="col-6 form-widget"> <h1 className="header">Supabase + RedwoodJS</h1> <p className="description">Sign in via magic link with your email below</p> <div> <input className="inputField" type="email" placeholder="Your email" value={email} onChange={(e) => setEmail(e.target.value)} /> </div> <div> <button onClick={(e) => { e.preventDefault() handleLogin(email) }} className={'button block'} disabled={loading} > {loading ? <span>Loading</span> : <span>Send magic link</span>} </button> </div> </div> </div> )}export default AuthSet up an account component#
After a user is signed in we can allow them to edit their profile details and manage their account.
Create a new component called Account.js.
yarn rw g component account ✔ Generating component files... ✔ Successfully wrote file `./web/src/components/Account/Account.test.js` ✔ Successfully wrote file `./web/src/components/Account/Account.stories.js` ✔ Successfully wrote file `./web/src/components/Account/Account.js`And then update the file to contain:
import { useAuth } from '@redwoodjs/auth'import { useEffect, useState } from 'react'const Account = () => { const { client: supabase, currentUser, logOut } = useAuth() const [loading, setLoading] = useState(true) const [username, setUsername] = useState(null) const [website, setWebsite] = useState(null) const [avatar_url, setAvatarUrl] = useState(null) useEffect(() => { getProfile() }, [supabase.auth.session]) async function getProfile() { try { setLoading(true) const user = supabase.auth.user() const { data, error, status } = await supabase .from('profiles') .select(`username, website, avatar_url`) .eq('id', user.id) .single() if (error && status !== 406) { throw error } if (data) { setUsername(data.username) setWebsite(data.website) setAvatarUrl(data.avatar_url) } } catch (error) { alert(error.message) } finally { setLoading(false) } } async function updateProfile({ username, website, avatar_url }) { try { setLoading(true) const user = supabase.auth.user() const updates = { id: user.id, username, website, avatar_url, updated_at: new Date(), } const { error } = await supabase.from('profiles').upsert(updates, { returning: 'minimal', // Don't return the value after inserting }) if (error) { throw error } alert('Updated profile!') } catch (error) { alert(error.message) } finally { setLoading(false) } } return ( <div className="row flex-center flex"> <div className="col-6 form-widget"> <h1 className="header">Supabase + RedwoodJS</h1> <p className="description">Your profile</p> <div className="form-widget"> <div> <label htmlFor="email">Email</label> <input id="email" type="text" value={currentUser.email} disabled /> </div> <div> <label htmlFor="username">Name</label> <input id="username" type="text" value={username || ''} onChange={(e) => setUsername(e.target.value)} /> </div> <div> <label htmlFor="website">Website</label> <input id="website" type="url" value={website || ''} onChange={(e) => setWebsite(e.target.value)} /> </div> <div> <button className="button primary block" onClick={() => updateProfile({ username, website, avatar_url })} disabled={loading} > {loading ? 'Loading ...' : 'Update'} </button> </div> <div> <button className="button block" onClick={() => logOut()}> Sign Out </button> </div> </div> </div> </div> )}export default AccountYou'll see the use of useAuth() several times. Redwood's useAuth hook provides convenient ways to access
logIn, logOut, currentUser, and access the supabase authenticate client. We'll use it to get an instance
of the Supabase client to interact with your API.
Update home page#
With all the components in place, update your HomePage page to use them:
import { useAuth } from '@redwoodjs/auth'import { MetaTags } from '@redwoodjs/web'import Account from 'src/components/Account'import Auth from 'src/components/Auth'const HomePage = () => { const { isAuthenticated } = useAuth() return ( <> <MetaTags title="Welcome" /> {!isAuthenticated ? <Auth /> : <Account />} </> )}export default HomePageWhat we're doing here is showing the sign-in form if you aren't signed in and your account profile if you are.
Profile photos#
Next, add a way for users to upload a profile photo. Supabase configures every project with Storage for managing large files like photos and videos.
Create an upload widget#
Create an avatar so the user can upload a profile photo. Start by creating a new component:
yarn rw g component avatar ✔ Generating component files... ✔ Successfully wrote file `./web/src/components/Avatar/Avatar.test.js` ✔ Successfully wrote file `./web/src/components/Avatar/Avatar.stories.js` ✔ Successfully wrote file `./web/src/components/Avatar/Avatar.js`Now, update your Avatar component to contain the following widget:
import { useAuth } from '@redwoodjs/auth'import { useEffect, useState } from 'react'const Avatar = ({ url, size, onUpload }) => { const { client: supabase } = useAuth() const [avatarUrl, setAvatarUrl] = useState(null) const [uploading, setUploading] = useState(false) useEffect(() => { if (url) downloadImage(url) }, [url]) async function downloadImage(path) { try { const { data, error } = await supabase.storage.from('avatars').download(path) if (error) { throw error } const url = URL.createObjectURL(data) setAvatarUrl(url) } catch (error) { console.log('Error downloading image: ', error.message) } } async function uploadAvatar(event) { try { setUploading(true) if (!event.target.files || event.target.files.length === 0) { throw new Error('You must select an image to upload.') } const file = event.target.files[0] const fileExt = file.name.split('.').pop() const fileName = `${Math.random()}.${fileExt}` const filePath = `${fileName}` const { error: uploadError } = await supabase.storage.from('avatars').upload(filePath, file) if (uploadError) { throw uploadError } onUpload(filePath) } catch (error) { alert(error.message) } finally { setUploading(false) } } return ( <div> {avatarUrl ? ( <img src={avatarUrl} alt="Avatar" className="avatar image" style={{ height: size, width: size }} /> ) : ( <div className="avatar no-image" style={{ height: size, width: size }} /> )} <div style={{ width: size }}> <label className="button primary block" htmlFor="single"> {uploading ? 'Uploading ...' : 'Upload'} </label> <input style={{ visibility: 'hidden', position: 'absolute', }} type="file" id="single" accept="image/*" onChange={uploadAvatar} disabled={uploading} /> </div> </div> )}export default AvatarLaunch!#
Once that's done, run this in a terminal window to launch the dev server:
yarn rw devAnd then open the browser to localhost:8910 and you should see the completed app.
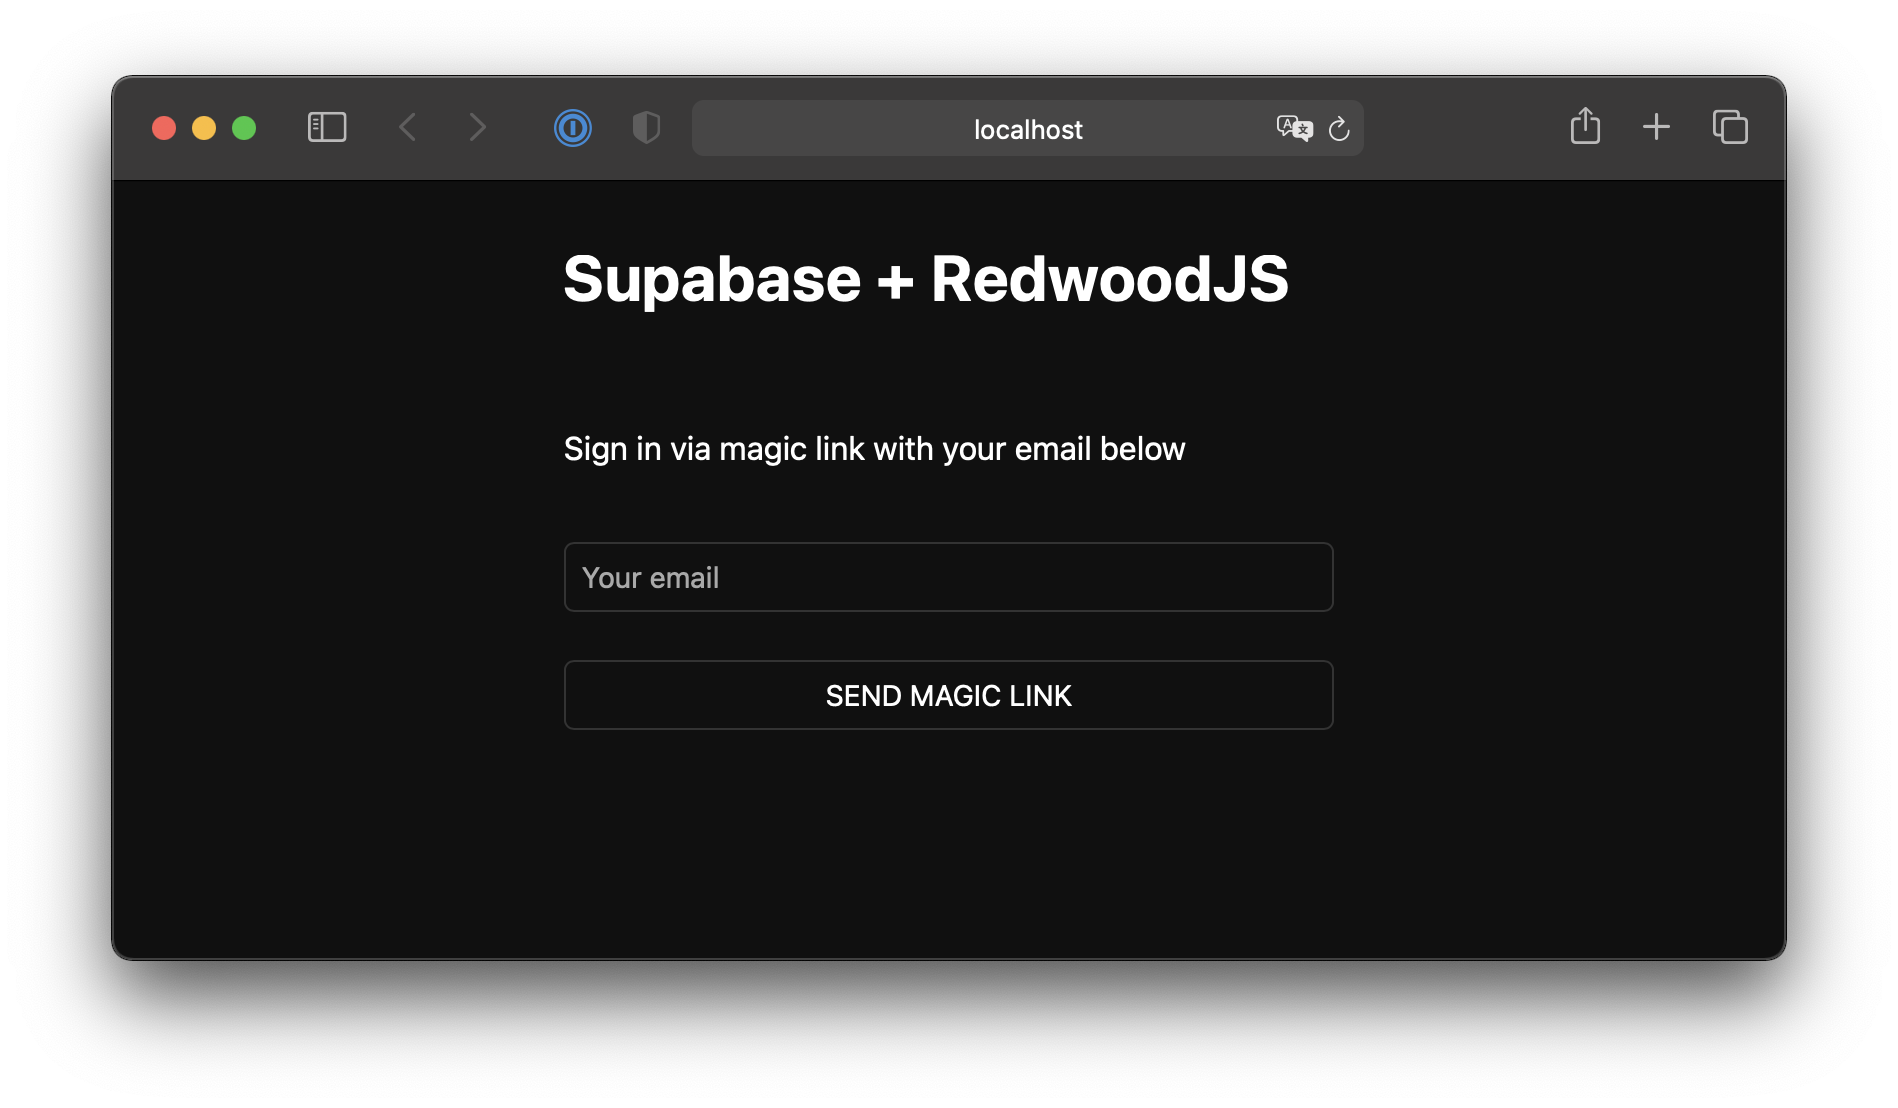
At this stage you have a fully functional application!
See also#
- Learn more about RedwoodJS
- Visit the RedwoodJS Discourse Community