Build a User Management App with SvelteKit
This tutorial demonstrates how to build a basic user management app. The app authenticates and identifies the user, stores their profile information in the database, and allows the user to log in, update their profile details, and upload a profile photo. The app uses:
- Supabase Database - a Postgres database for storing your user data and Row Level Security so data is protected and users can only access their own information.
- Supabase Auth - allow users to sign up and log in.
- Supabase Storage - allow users to upload a profile photo.
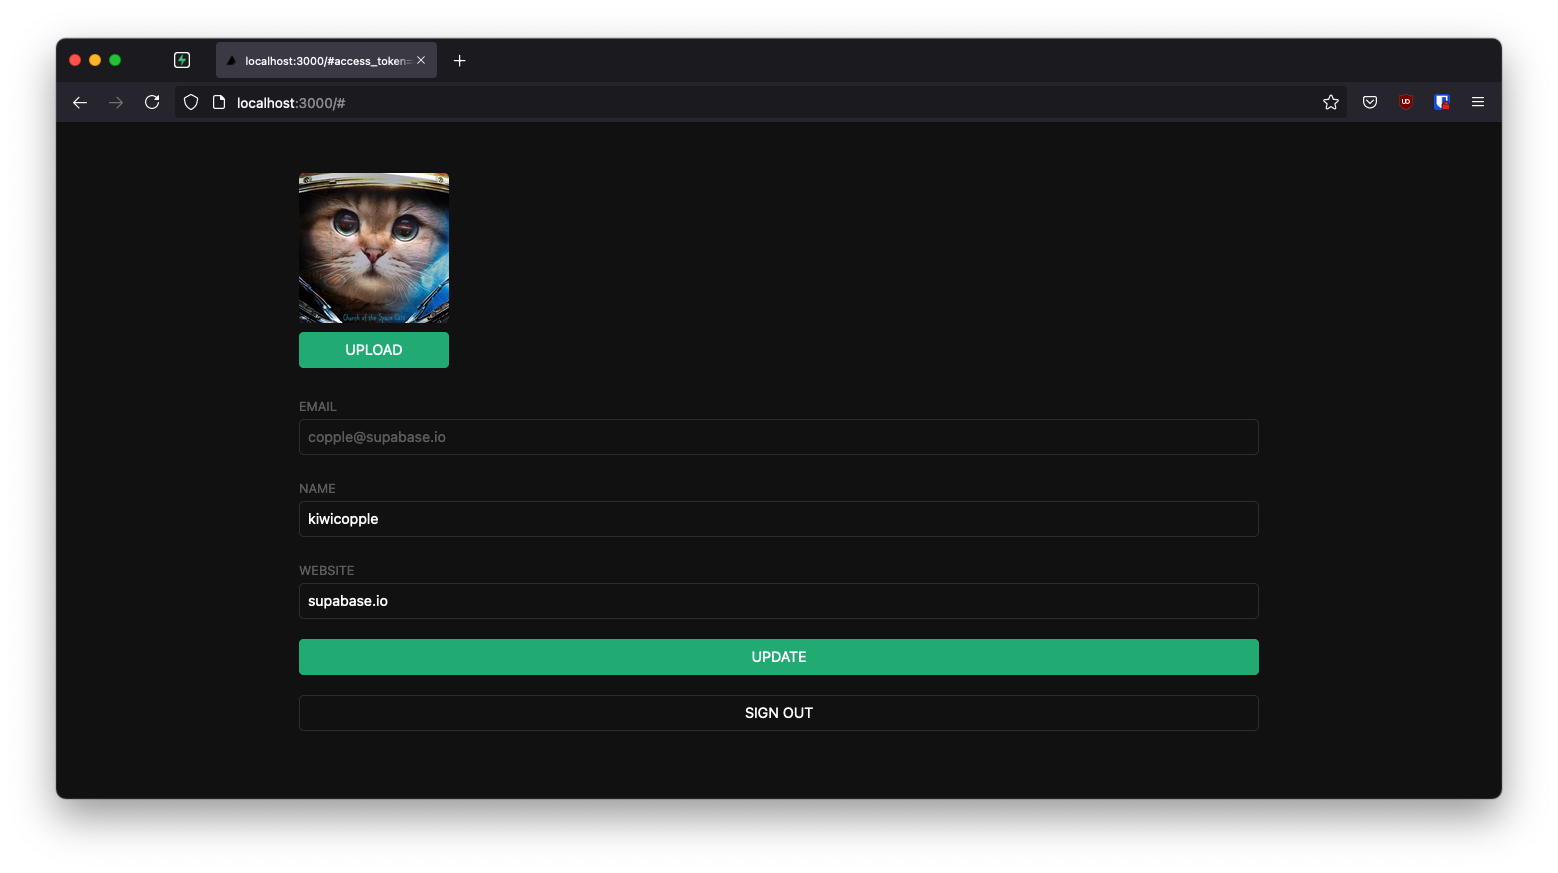
If you get stuck while working through this guide, you can find the full example on GitHub.
Project setup#
Before you start building you need to set up the Database and API. You can do this by starting a new Project in Supabase and then creating a "schema" inside the database.
Create a project#
- Create a new project in the Supabase Dashboard.
- Enter your project details.
- Wait for the new database to launch.
Set up the database schema#
Now set up the database schema. You can use the "User Management Starter" quickstart in the SQL Editor, or you can copy/paste the SQL from below and run it.
- Go to the SQL Editor page in the Dashboard.
- Click User Management Starter under the Reference > Examples tab.
- Click Run.
You can pull the database schema down to your local project by running the db pull command. Read the local development docs for detailed instructions.
supabase link --project-ref <project-id># You can get <project-id> from your project's dashboard URL: https://supabase.com/dashboard/project/<project-id>supabase db pullGet API details#
To interact with data in database tables, you use the client libraries that wrap the auto-generated Data API endpoints, authenticating using the Project URL and key from the project Connect dialog.
See API keys for a full explanation of all key types, their uses, and where to find them.
Building the app#
Start building the Svelte app from scratch.
Initialize a Svelte app#
Use the SvelteKit Skeleton Project to initialize an app called supabase-sveltekit (for this tutorial, select "SvelteKit minimal" and use TypeScript):
npx sv create supabase-sveltekitcd supabase-sveltekitnpm installThen install the Supabase client library: supabase-js
npm install @supabase/supabase-jsAnd finally, save the environment variables in a .env file.
All you need are the PUBLIC_SUPABASE_URL and the key that you copied earlier.
PUBLIC_SUPABASE_URL="YOUR_SUPABASE_URL"PUBLIC_SUPABASE_PUBLISHABLE_KEY="YOUR_SUPABASE_PUBLISHABLE_KEY"App styling (optional)#
An optional step is to update the CSS file src/styles.css to make the app look nice.
You can find the full contents of this file in the example repository.
Creating a Supabase client for SSR#
The ssr package configures Supabase to use Cookies, which are required for server-side languages and frameworks.
Install the SSR package:
npm install @supabase/ssrCreating a Supabase client with the ssr package automatically configures it to use Cookies. This means the user's session is available throughout the entire SvelteKit stack - page, layout, server, and hooks.
Add the code below to a src/hooks.server.ts file to initialize the client on the server:
// src/hooks.server.tsimport { PUBLIC_SUPABASE_URL, PUBLIC_SUPABASE_PUBLISHABLE_KEY } from '$env/static/public'import { createServerClient } from '@supabase/ssr'import type { Handle } from '@sveltejs/kit'export const handle: Handle = async ({ event, resolve }) => { event.locals.supabase = createServerClient(PUBLIC_SUPABASE_URL, PUBLIC_SUPABASE_PUBLISHABLE_KEY, { cookies: { getAll: () => event.cookies.getAll(), /** * Note: You have to add the `path` variable to the * set and remove method due to sveltekit's cookie API * requiring this to be set, setting the path to `/` * will replicate previous/standard behaviour (https://kit.svelte.dev/docs/types#public-types-cookies) */ setAll: (cookiesToSet, headers) => { cookiesToSet.forEach(({ name, value, options }) => { event.cookies.set(name, value, { ...options, path: '/' }) }) if (Object.keys(headers).length > 0) { event.setHeaders(headers) } }, }, }) return resolve(event, { filterSerializedResponseHeaders(name: string) { return name === 'content-range' || name === 'x-supabase-api-version' }, })}Note that auth.getSession reads the auth token and the unencoded session data from the local storage medium. It doesn't send a request back to the Supabase Auth server unless the local session is expired.
You should never trust the unencoded session data if you're writing server code, since it could be tampered with by the sender. If you need verified, trustworthy user data, call auth.getUser instead, which always makes a request to the Auth server to fetch trusted data.
As this tutorial uses TypeScript the compiler complains about event.locals.supabase. You can fix this by updating the src/app.d.ts with the content below:
import type { SupabaseClient } from '@supabase/supabase-js'import type { Database } from './database.types'// See https://kit.svelte.dev/docs/types#app// for information about these interfacesdeclare global { namespace App { // interface Error {} interface Locals { supabase: SupabaseClient<Database> } // interface PageState {} // interface Platform {} }}export {}Create a new src/routes/+layout.server.ts file to handle the session on the server-side.
// src/routes/+layout.server.tsimport type { LayoutServerLoad } from './$types'export const load: LayoutServerLoad = async ({ cookies }) => { return { cookies: cookies.getAll(), }}Start the dev server (npm run dev) to generate the ./$types files we are referencing in our project.
Create a new src/routes/+layout.ts file to handle the session and the supabase object on the client-side.
// src/routes/+layout.tsimport { PUBLIC_SUPABASE_PUBLISHABLE_KEY, PUBLIC_SUPABASE_URL } from '$env/static/public'import type { LayoutLoad } from './$types'import { createBrowserClient, createServerClient, isBrowser } from '@supabase/ssr'export const load: LayoutLoad = async ({ fetch, data, depends }) => { depends('supabase:auth') const supabase = isBrowser() ? createBrowserClient(PUBLIC_SUPABASE_URL, PUBLIC_SUPABASE_PUBLISHABLE_KEY, { global: { fetch, }, }) : createServerClient(PUBLIC_SUPABASE_URL, PUBLIC_SUPABASE_PUBLISHABLE_KEY, { global: { fetch, }, cookies: { getAll() { return data.cookies }, }, }) /** * `getClaims` validates the JWT signature locally (for asymmetric keys) once * the relevant signing keys are available or cached, and returns the decoded * claims. While an initial or periodic network request may be required to * fetch or refresh keys, this is both faster and safer than `getSession`, * which does not validate the JWT. */ const { data: claimsData, error } = await supabase.auth.getClaims() const claims = error ? null : claimsData?.claims return { supabase, claims }}Create src/routes/+layout.svelte:
<!-- src/routes/+layout.svelte --><script lang="ts"> import '../styles.css' import { invalidate } from '$app/navigation' import { onMount } from 'svelte' let { data, children } = $props() let { supabase, claims } = $derived(data) onMount(() => { const { data } = supabase.auth.onAuthStateChange((event, _session) => { if (_session?.expires_at !== claims?.exp) { invalidate('supabase:auth') } }) return () => data.subscription.unsubscribe() })</script><svelte:head> <title>User Management</title></svelte:head><div class="container" style="padding: 50px 0 100px 0"> {@render children()}</div>Set up a sign-in page#
Create a magic link sign-in/sign-up page for your application by updating the routes/+page.svelte file:
<!-- src/routes/+page.svelte --><script lang="ts"> import { enhance } from '$app/forms' import type { ActionData, SubmitFunction } from './$types.js' interface Props { form: ActionData } let { form }: Props = $props() let loading = $state(false) const handleSubmit: SubmitFunction = () => { loading = true return async ({ update }) => { update() loading = false } }</script><svelte:head> <title>User Management</title></svelte:head><form class="row flex flex-center" method="POST" use:enhance={handleSubmit}> <div class="col-6 form-widget"> <h1 class="header">Supabase + SvelteKit</h1> <p class="description">Sign in via magic link with your email below</p> {#if form?.message !== undefined} <div class="success {form?.success ? '' : 'fail'}"> {form?.message} </div> {/if} <div> <label for="email">Email address</label> <input id="email" name="email" class="inputField" type="email" placeholder="Your email" value={form?.email ?? ''} /> </div> {#if form?.errors?.email} <span class="flex items-center text-sm error"> {form?.errors?.email} </span> {/if} <div> <button class="button primary block"> { loading ? 'Loading' : 'Send magic link' } </button> </div> </div></form>Create a src/routes/+page.server.ts file that handles the magic link form when submitted.
// src/routes/+page.server.tsimport { fail, redirect } from '@sveltejs/kit'import type { Actions, PageServerLoad } from './$types'export const load: PageServerLoad = async ({ url, locals: { supabase } }) => { const { data, error } = await supabase.auth.getClaims() // if the user is already logged in return them to the account page if (!error && data?.claims) { redirect(303, '/account') } return { url: url.origin }}export const actions: Actions = { default: async (event) => { const { url, request, locals: { supabase }, } = event const formData = await request.formData() const email = formData.get('email') as string const validEmail = /^[\w-\.+]+@([\w-]+\.)+[\w-]{2,8}$/.test(email) if (!validEmail) { return fail(400, { errors: { email: 'Please enter a valid email address' }, email }) } const { error } = await supabase.auth.signInWithOtp({ email }) if (error) { return fail(400, { success: false, email, message: `There was an issue, Please contact support.`, }) } return { success: true, message: 'Please check your email for a magic link to log into the website.', } },}Email template#
Change the email template to support a server-side authentication flow.
Before proceeding, change the email template to support sending a token hash:
- Go to the Auth > Emails page in the project dashboard.
- Select the Confirm signup template.
- Change
{{ .ConfirmationURL }}to{{ .SiteURL }}/auth/confirm?token_hash={{ .TokenHash }}&type=email. - Repeat the previous step for Magic link template.
Did you know?
You can also customize emails sent out to new users, including the email's looks, content, and query parameters. Check out the settings of your project.
Confirmation endpoint#
As this is a server-side rendering (SSR) environment, you need to create a server endpoint responsible for exchanging the token_hash for a session.
The following code snippet performs the following steps:
- Retrieves the
token_hashsent back from the Supabase Auth server using thetoken_hashquery parameter. - Exchanges this
token_hashfor a session, which you store in storage (in this case, cookies). - Finally, redirect the user to the
accountpage or theerrorpage.
// src/routes/auth/confirm/+server.jsimport type { EmailOtpType } from '@supabase/supabase-js'import { redirect } from '@sveltejs/kit'import type { RequestHandler } from './$types'export const GET: RequestHandler = async ({ url, locals: { supabase } }) => { const token_hash = url.searchParams.get('token_hash') const type = url.searchParams.get('type') as EmailOtpType | null const next = url.searchParams.get('next') ?? '/account' /** * Clean up the redirect URL by deleting the Auth flow parameters. * * `next` is preserved for now, because it's needed in the error case. */ const redirectTo = new URL(url) redirectTo.pathname = next redirectTo.searchParams.delete('token_hash') redirectTo.searchParams.delete('type') if (token_hash && type) { const { error } = await supabase.auth.verifyOtp({ type, token_hash }) if (!error) { redirectTo.searchParams.delete('next') redirect(303, redirectTo) } } redirectTo.pathname = '/auth/error' redirect(303, redirectTo)}Authentication error page#
If there is an error with confirming the token, redirect the user to an error page.
<p>Login error</p>Account page#
After a user signs in, they need to be able to edit their profile details page.
Create a new src/routes/account/+page.svelte file with the content below.
<script lang="ts"> import { enhance } from '$app/forms'; import type { SubmitFunction } from '@sveltejs/kit'; // ... let { data, form } = $props() let { claims, supabase, profile } = $derived(data) let profileForm: HTMLFormElement let loading = $state(false) let fullName: string = profile?.full_name ?? '' let username: string = profile?.username ?? '' let website: string = profile?.website ?? '' // ... const handleSubmit: SubmitFunction = () => { loading = true return async ({ update }) => { loading = false update() } } const handleSignOut: SubmitFunction = () => { loading = true return async ({ update }) => { loading = false update() } }</script><div class="form-widget"> <form class="form-widget" method="post" action="?/update" use:enhance={handleSubmit} bind:this={profileForm} // ... <div> <label for="email">Email</label> <input id="email" type="text" value={claims?.email ?? ''} disabled /> </div> <div> <label for="fullName">Full Name</label> <input id="fullName" name="fullName" type="text" value={form?.fullName ?? fullName} /> </div> <div> <label for="username">Username</label> <input id="username" name="username" type="text" value={form?.username ?? username} /> </div> <div> <label for="website">Website</label> <input id="website" name="website" type="url" value={form?.website ?? website} /> </div> <div> <input type="submit" class="button block primary" value={loading ? 'Loading...' : 'Update'} disabled={loading} /> </div> </form> <form method="post" action="?/signout" use:enhance={handleSignOut}> <div> <button class="button block" disabled={loading}>Sign Out</button> </div> </form></div>Now, create the associated src/routes/account/+page.server.ts file that handles loading data from the server through the load function
and handle all form actions through the actions object.
import { fail, redirect } from '@sveltejs/kit'import type { Actions, PageServerLoad } from './$types'export const load: PageServerLoad = async ({ locals: { supabase } }) => { const { data: claimsData, error } = await supabase.auth.getClaims() if (error || !claimsData?.claims) { redirect(303, '/') } const { claims } = claimsData const { data: profile } = await supabase .from('profiles') .select(`username, full_name, website, avatar_url`) .eq('id', claims.sub) .single() return { claims, profile }}export const actions: Actions = { update: async ({ request, locals: { supabase } }) => { const formData = await request.formData() const fullName = formData.get('fullName') as string const username = formData.get('username') as string const website = formData.get('website') as string const avatarUrl = formData.get('avatarUrl') as string const { data: claimsData, error: claimsError } = await supabase.auth.getClaims() if (claimsError || !claimsData?.claims) { return fail(401, { fullName, username, website, avatarUrl }) } const { error } = await supabase.from('profiles').upsert({ id: claimsData.claims.sub, full_name: fullName, username, website, avatar_url: avatarUrl, updated_at: new Date(), }) if (error) { return fail(500, { fullName, username, website, avatarUrl, }) } return { fullName, username, website, avatarUrl, } }, signout: async ({ locals: { supabase } }) => { await supabase.auth.signOut() redirect(303, '/') },}Profile photos#
Next, add a way for users to upload a profile photo. Supabase configures every project with Storage for managing large files like photos and videos.
Create an upload widget#
Start by creating a new component called Avatar.svelte in the src/routes/account directory:
<!-- src/routes/account/Avatar.svelte --><script lang="ts"> import type { SupabaseClient } from '@supabase/supabase-js' interface Props { size?: number url?: string supabase: SupabaseClient onupload?: () => void } let { size = 10, url = $bindable(), supabase, onupload }: Props = $props() let avatarUrl: string | null = $state(null) let uploading = $state(false) let files: FileList = $state() const downloadImage = async (path: string) => { try { const { data, error } = await supabase.storage.from('avatars').download(path) if (error) { throw error } const url = URL.createObjectURL(data) avatarUrl = url } catch (error) { if (error instanceof Error) { console.log('Error downloading image: ', error.message) } } } const uploadAvatar = async () => { try { uploading = true if (!files || files.length === 0) { throw new Error('You must select an image to upload.') } const file = files[0] const fileExt = file.name.split('.').pop() const filePath = `${Math.random()}.${fileExt}` const { error } = await supabase.storage.from('avatars').upload(filePath, file) if (error) { throw error } url = filePath setTimeout(() => { onupload?.() }, 100) } catch (error) { if (error instanceof Error) { alert(error.message) } } finally { uploading = false } } $effect(() => { if (url) downloadImage(url) })</script><div> {#if avatarUrl} <img src={avatarUrl} alt={avatarUrl ? 'Avatar' : 'No image'} class="avatar image" style="height: {size}em; width: {size}em;" /> {:else} <div class="avatar no-image" style="height: {size}em; width: {size}em;"></div> {/if} <input type="hidden" name="avatarUrl" value={url} /> <div style="width: {size}em;"> <label class="button primary block" for="single"> {uploading ? 'Uploading ...' : 'Upload'} </label> <input style="visibility: hidden; position:absolute;" type="file" id="single" accept="image/*" bind:files onchange={uploadAvatar} disabled={uploading} /> </div></div>Update the account page#
With the Avatar component created, update src/routes/account/+page.svelte to include it:
<script lang="ts"> import { enhance } from '$app/forms'; import type { SubmitFunction } from '@sveltejs/kit'; import Avatar from './Avatar.svelte' let { data, form } = $props() let { claims, supabase, profile } = $derived(data) let profileForm: HTMLFormElement let loading = $state(false) let fullName: string = profile?.full_name ?? '' let username: string = profile?.username ?? '' let website: string = profile?.website ?? '' let avatarUrl: string = $state(profile?.avatar_url ?? '') const handleSubmit: SubmitFunction = () => { loading = true return async ({ update }) => { loading = false update() } } const handleSignOut: SubmitFunction = () => { loading = true return async ({ update }) => { loading = false update() } }</script><div class="form-widget"> <form class="form-widget" method="post" action="?/update" use:enhance={handleSubmit} bind:this={profileForm} > <Avatar {supabase} bind:url={avatarUrl} size={10} onupload={() => { profileForm.requestSubmit(); }} /> <input type="hidden" name="avatarUrl" value={avatarUrl} /> <div> <label for="email">Email</label> <input id="email" type="text" value={claims?.email ?? ''} disabled /> </div> <div> <label for="fullName">Full Name</label> <input id="fullName" name="fullName" type="text" value={form?.fullName ?? fullName} /> </div> <div> <label for="username">Username</label> <input id="username" name="username" type="text" value={form?.username ?? username} /> </div> <div> <label for="website">Website</label> <input id="website" name="website" type="url" value={form?.website ?? website} /> </div> <div> <input type="submit" class="button block primary" value={loading ? 'Loading...' : 'Update'} disabled={loading} /> </div> </form> <form method="post" action="?/signout" use:enhance={handleSignOut}> <div> <button class="button block" disabled={loading}>Sign Out</button> </div> </form></div>Launch!#
With all the pages in place, run this command in a terminal:
npm run devAnd then open the browser to localhost:5173 and you should see the completed app.
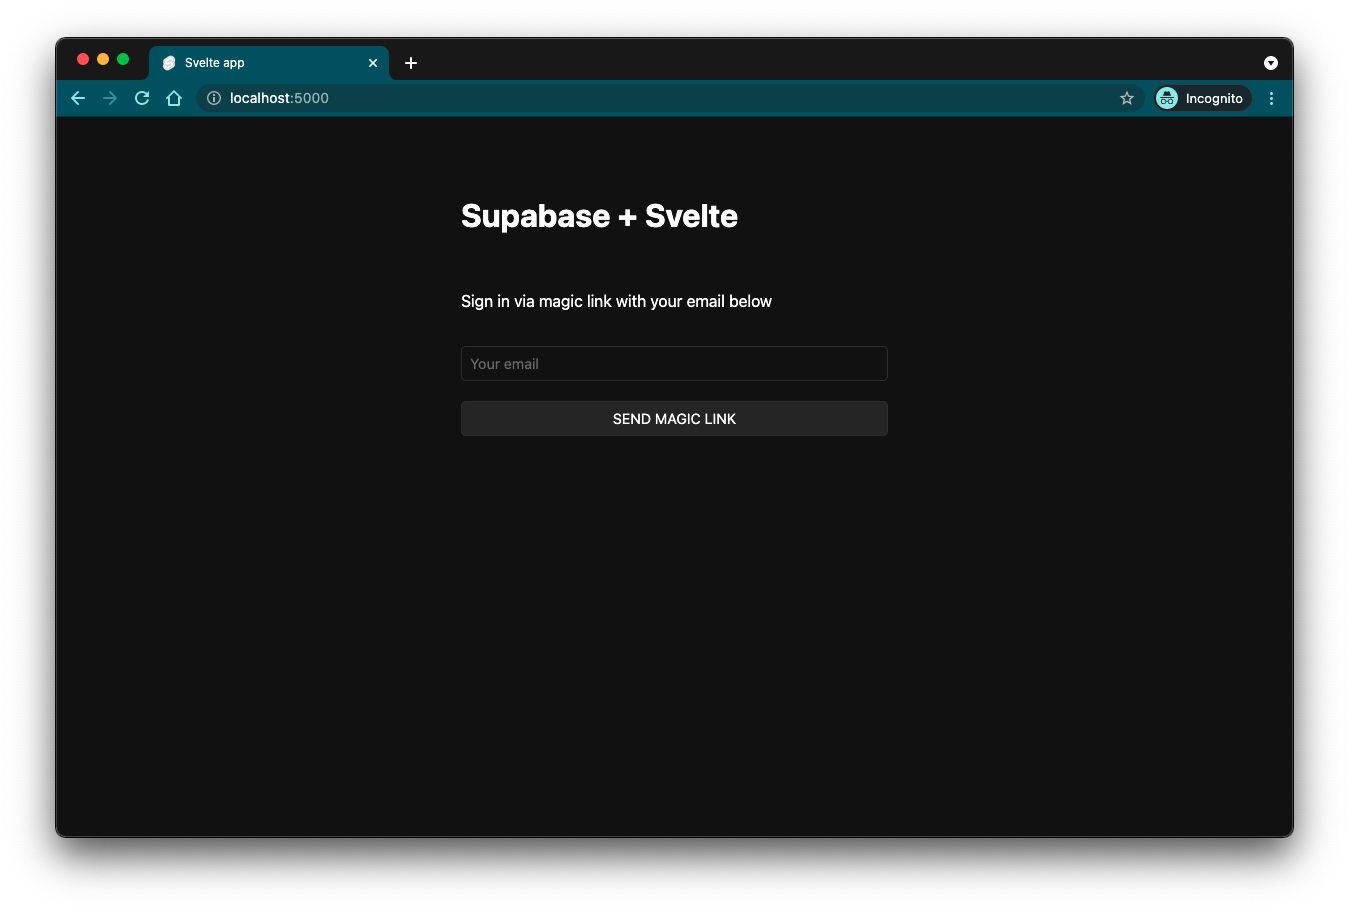
At this stage you have a fully functional application!